Solenoid valves are essential components in numerous applications, providing precise control over the flow of liquids or gases. However, like any mechanical device, they require periodic maintenance to ensure optimal performance. In this comprehensive guide, we'll not only walk you through the essential steps of cleaning a solenoid valve, empowering you to keep this critical component operating smoothly for an extended lifespan, but also explore key considerations on how to choose the right solenoid valve for your specific needs.
Materials Needed
Materials play a crucial role in maintaining and enhancing the performance of solenoid valves, especially when dealing with replacement coils. Before embarking on the cleaning journey or considering solenoid valve replacement coils, it's essential to assemble the necessary tools and materials. A reliable wrench or pliers, a suitable cleaning solution (such as vinegar or a mild detergent), a soft brush or toothbrush, compressed air, a container for soaking parts, and new gaskets or O-rings (if needed) are essential. Whether you're cleaning the existing coil or opting for a replacement, prioritizing safety is paramount, and this includes the inclusion of gloves and eye protection.
Step 1: Shut off the Power
Begin the process by disconnecting the power supply to the solenoid valve. This precautionary step ensures a safe working environment, preventing any electrical mishaps during the cleaning procedure.
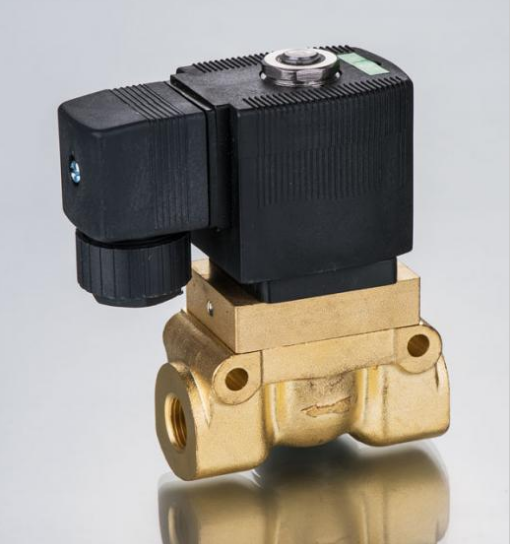
Step 2: Remove the Solenoid Valve
Using a wrench or pliers, carefully disconnect the solenoid valve from the system. Take note of its current orientation – this will prove crucial during the reinstallation process.
Step 3: Disassemble the Valve
Delve into the heart of the solenoid valve by methodically disassembling its components. This typically involves separating the coil, housing, and internal parts. Exercise caution to avoid causing any additional damage during this step.
Step 4: Inspect for Damage
With the valve disassembly, meticulously inspect each component for signs of wear or damage. If any gaskets, O-rings, or other parts show deterioration, it's crucial to replace them to maintain optimal functionality.
Step 5: Soak Components
Immerse the disassembled components in a container filled with a cleaning solution. The choice of cleaning solution may vary, but a mixture of vinegar and water or a mild detergent solution is often effective. Allow sufficient time for the solution to penetrate and loosen deposits.
Step 6: Clean with Brush
Armed with a soft brush or toothbrush, delicately scrub away any remaining deposits on the valve components. Pay special attention to intricate areas, small openings, and passages to ensure a thorough cleaning.
Step 7: Rinse Thoroughly
After the soaking process, rinse all components meticulously with clean water. This step is crucial to eliminate any residual cleaning solution, preventing potential interference with the valve's operation.
Step 8: Blow Out Debris
Employ compressed air to blow out any lingering debris from the valve components. This ensures that no particles are left behind, maintaining the integrity of the valve's functionality.
Step 9: Reassemble the Valve
With the components now clean, embark on the reassembly process. Carefully reconstruct the solenoid valve, paying close attention to the correct positioning of each component. If any gaskets or O-rings were removed, replace them with new ones.
Step 10: Reinstall the Valve
Return the solenoid valve to its rightful place within the system. Use the wrench or pliers to reconnect the valve securely, ensuring proper alignment as noted during the initial removal.
Step 11: Test the Valve
Gradually restore power to the solenoid valve and test its operation. Confirm that it opens and closes correctly, validating the success of the cleaning process.
Step 12: Monitor Performance
The final step involves vigilant monitoring of the solenoid valve's performance over time. Regular observation ensures that it continues to operate smoothly and reliably, signalling the success of your maintenance efforts.
Choosing the Right Solenoid Valve
When considering the selection of solenoid valves for specific applications, key considerations on how to choose the right solenoid valve come into play. Factors such as the type of fluid or gas, required flow rates, environmental conditions, and compatibility with the overall system dynamics must be carefully evaluated. By understanding how solenoid valves respond to test pulses and considering these key factors, one can harness the full potential of solenoid valve technology in pneumatic systems, ensuring reliable and efficient operation.
Solenoid Valve Responses
Understanding how solenoid valves respond to test pulses is crucial for optimizing their performance in pneumatic systems. Solenoid valves play an important role in controlling the flow of liquids or gases, particularly in pneumatic applications where precision is paramount. The benefits of solenoid valve technology in pneumatic systems are multifaceted, encompassing rapid response times, efficient energy utilization, and a compact design.
Regular cleaning and maintenance are paramount to extending the lifespan and efficiency of solenoid valves. Always refer to the manufacturer's guidelines for specific instructions. If you encounter issues or are unsure, consult the manufacturer or seek professional assistance. With these steps, you'll keep your solenoid valve in top-notch condition, ensuring reliable and consistent performance.